How to Take Professional Looking Photos on Your iPhone
Jul 10, 2019
Taking professional looking photos used to require expensive equipment and fancy editing tools, but not anymore. Anyone can take beautiful photos and all you need is your iPhone! Here’s how to get the most out of your iPhone photography:
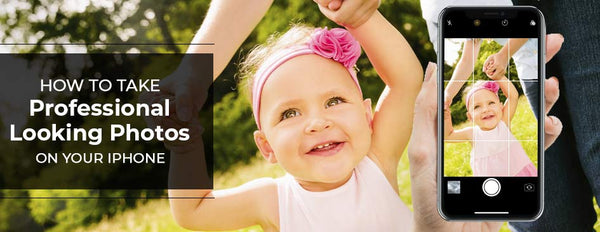
Rule of Thirds.
Studies have shown that most people’s eyes do not go directly to the center of the photograph. The Rule of Thirds divides a picture into 9 different squares to help you position objects in the photograph. To turn on the guidelines, go to settings, tap on camera, and toggle the switch called “Grid”. Position the subjects of your photos along the lines or at their intersection to create interesting and professional looking photos.

Burst Mode
Action shots are hard to capture. Hold down on the camera button to take a series of shots. You can then tap on the “stack” of photos and choose the best one.
Avoid Flash
Apple’s flash has improved significantly with the addition of True Tone Flash, but it still does not compare to natural lighting when it comes to creating professional looking photos. If the natural lighting isn’t enough, try editing the exposure. This can be done before and after a photo has been taken. While in the camera mode, simply tap the screen to focus on your subject and slide the Sun icon to change the exposure. To edit the exposure after the photo has been taken, open the picture in the Photo app and tap edit in the top right-hand corner. Select the dial icon at the bottom of the screen and edit the “light”.
Camera and Editing Apps
There are tons of camera and photo editing apps available in the app store. Using a camera app can allow you to capture cleaner and clearer images by adjusting the camera settings. Photo editing apps are great for adding filters and fixing photos to look more professional. Check out our blog post about 6 of the Best Photo Editing Apps.
Portrait Mode
The iPhone camera app gives you a handful of shooting modes, but one of the newer features is Portrait Mode. Portrait Mode focuses on your subject while blurring the distracting background. It lets you create beautiful portrait photos that will convince anyone you’re a professional.

Try Different Perspectives
It’s natural to want to shoot from chest or face height, however changing up perspectives can add interest to your photos. Try shooting from the ground up or from up high looking down. Capturing objects in the foreground is a great way to add depth to your photo.
Use the Timer for Selfies
Selfies don’t have to look impulsive and unprofessional. Try using a tripod or propping your phone up somewhere steady and using the timer for photos you want to star in. In the camera app, tap the timer icon at the top of the screen and select either the 3 second or 10 second timer. And “click”, you have a selfie without the selfie stick!

Use the Volume Button
Try using the volume buttons next time you take a photo on your iPhone. It can help stabilize your hand when taking photos, leading to clearer and cleaner photos.
Taking professional looking photos is easier than ever, and now protecting them is too! Easily backup your photos to a Picture Keeper Connect and know that your memories are stored in a safe place!